You found an MCP server you want to use. Now what? This guide covers the exact steps to connect any MCP server to every major AI client — Claude, Cursor, VS Code, ChatGPT, and Windsurf — with enterprise security best practices.
According to our analytics, 73% of visitors to our App Catalog have the same question: “I subscribed. How do I actually connect this?” This guide answers that question once and for all.
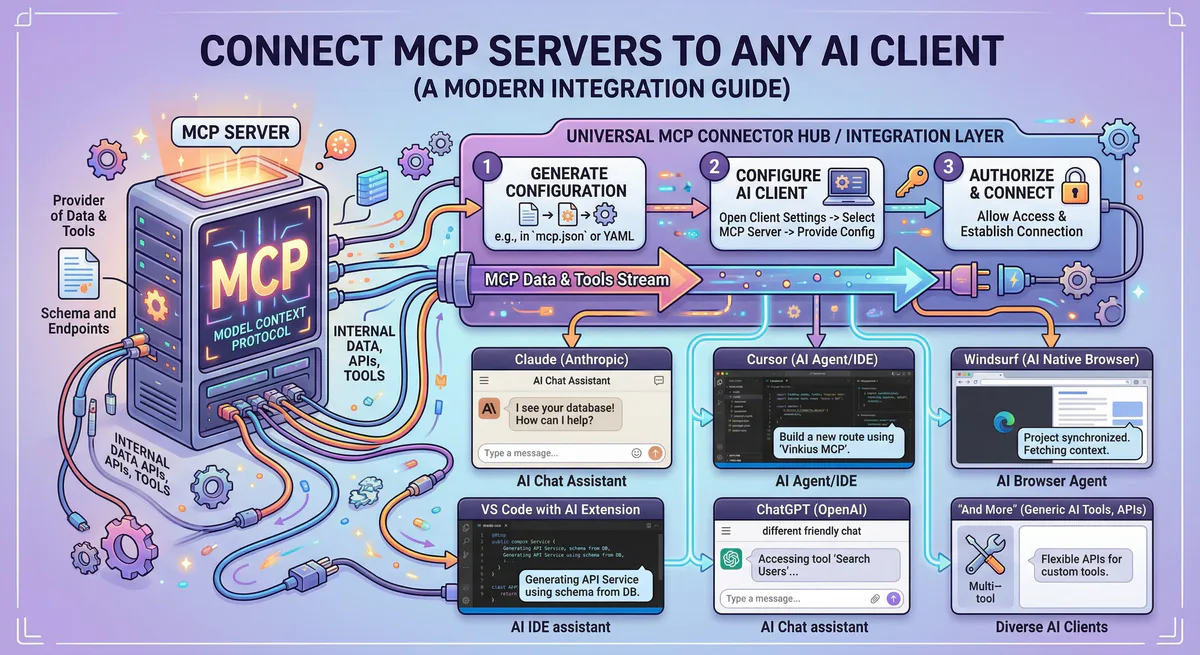
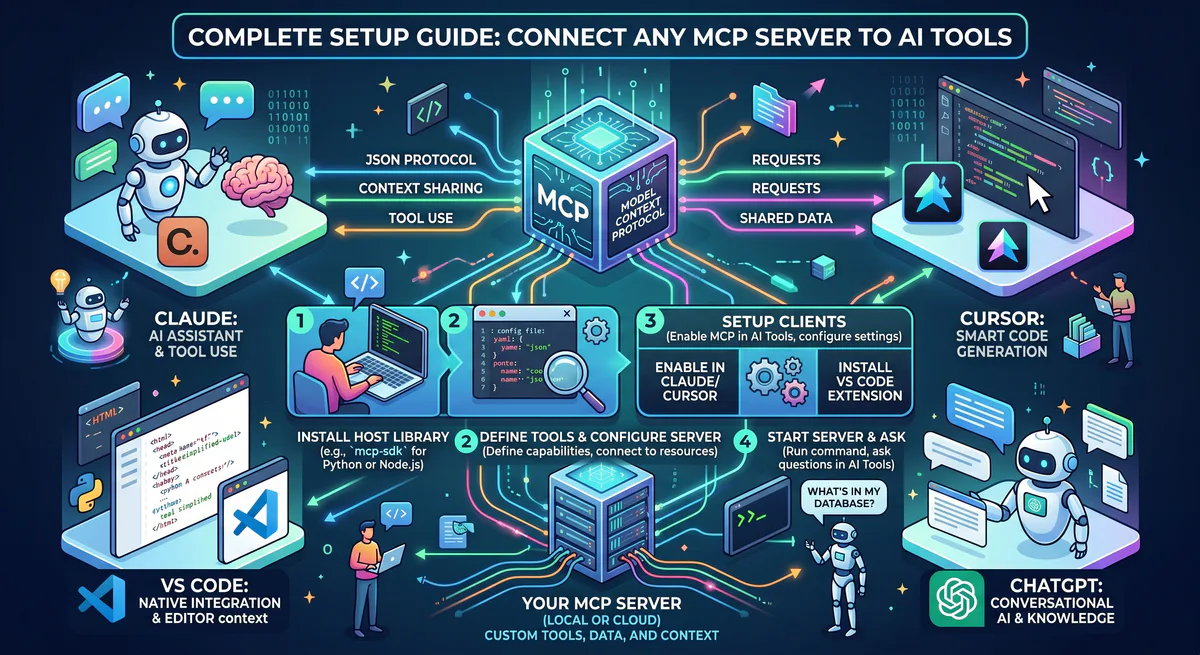
Quick Start: The Universal Process
Regardless of which AI client you use, the process follows three steps:
- Subscribe to an MCP server in our App Catalog (e.g., Slack MCP, GitHub MCP)
- Copy the connection URL we provide
- Paste into your AI client’s MCP configuration
The connection URL looks like this:
https://edge.vinkius.com/mcp/your-server-id?token=your-secure-tokenThis URL is your secure, governed connection. It carries your credentials through our encrypted vault — you never expose raw API keys to the AI.
Claude Desktop (Anthropic)
Claude Desktop is the most popular MCP client, with native support since v1.0.
Step-by-Step
- Open Claude Desktop
- Go to Settings → Developer → Edit Config
- This opens
claude_desktop_config.json. Add your server:
{
  "mcpServers": {
    "slack": {
      "url": "https://edge.vinkius.com/mcp/slack?token=YOUR_TOKEN"
    },
    "github": {
      "url": "https://edge.vinkius.com/mcp/github?token=YOUR_TOKEN"
    }
  }
}- Save the file
- Restart Claude Desktop completely (Quit → Reopen, not just close the window)
- Verify: You should see a 🔧 icon in the chat input showing available tools
Troubleshooting
| Problem | Solution |
|---|---|
| Tools don’t appear | Fully quit and restart (not just close window) |
| “Server disconnected” error | Check your internet connection; verify token hasn’t expired |
| Config file not found | On Windows: %APPDATA%\Claude\claude_desktop_config.json. On Mac: ~/Library/Application Support/Claude/claude_desktop_config.json |
| JSON syntax error | Validate your JSON at jsonlint.com — common issue: missing comma between servers |
Cursor IDE
Cursor has built-in MCP support for connecting AI to external tools while coding.
Step-by-Step (Global)
- Open Cursor → Settings (Cmd+, or Ctrl+,)
- Navigate to Features → MCP
- Click “Add new global MCP server”
- Enter your server configuration:
{
  "slack": {
    "url": "https://edge.vinkius.com/mcp/slack?token=YOUR_TOKEN"
  }
}- The server appears in the MCP panel immediately — no restart needed
Step-by-Step (Per-Project)
For project-specific configurations (shareable with your team):
- Create
.cursor/mcp.jsonin your project root - Add your servers:
{
  "mcpServers": {
    "github": {
      "url": "https://edge.vinkius.com/mcp/github?token=YOUR_TOKEN"
    },
    "sentry": {
      "url": "https://edge.vinkius.com/mcp/sentry?token=YOUR_TOKEN"
    }
  }
}- Commit to Git (exclude tokens — use environment variables for team sharing)
Troubleshooting
| Problem | Solution |
|---|---|
| Server shows “Disconnected” | Click the refresh icon next to the server name |
| Agent doesn’t use tools | Make sure you’re in Agent mode (Cmd+I), not Chat mode |
| Tools aren’t listed | Check that the MCP panel shows a green status dot |
VS Code (GitHub Copilot + MCP)
VS Code now supports MCP servers through GitHub Copilot and extensions.
Step-by-Step
- Open VS Code
- Command Palette (Cmd+Shift+P) → MCP: Add Server
- Select “HTTP/SSE” as transport type
- Enter server URL:
https://edge.vinkius.com/mcp/slack?token=YOUR_TOKEN - Give it a name:
slack - The server appears in your MCP panel
Alternative: Settings File
Add to .vscode/settings.json:
{
  "mcp.servers": {
    "slack": {
      "url": "https://edge.vinkius.com/mcp/slack?token=YOUR_TOKEN"
    }
  }
}
ChatGPT (OpenAI)
ChatGPT added MCP connector support in 2026.
Step-by-Step
- Open ChatGPT → Settings
- Connectors → Add Connector
- Select “MCP Server”
- Paste your connection URL
- ChatGPT validates the connection and shows available tools
- Start chatting — ChatGPT will automatically use the tools when relevant
Windsurf (Codeium)
Windsurf supports MCP servers for AI-powered coding assistance.
Step-by-Step
- Open Windsurf
- Settings → MCP
- Click “Add Server”
- Enter your URL and give the server a name
- Windsurf automatically discovers available tools
Connecting Multiple Servers (Multi-Tool Recipes)
The real power of MCP is connecting multiple servers simultaneously. Here’s how to configure a multi-tool recipe like our DevOps War Room (Sentry + Datadog + PagerDuty + GitHub + Slack):
Claude Desktop Configuration
{
  "mcpServers": {
    "sentry": {
      "url": "https://edge.vinkius.com/mcp/sentry?token=TOKEN_1"
    },
    "datadog": {
      "url": "https://edge.vinkius.com/mcp/datadog?token=TOKEN_2"
    },
    "pagerduty": {
      "url": "https://edge.vinkius.com/mcp/pagerduty?token=TOKEN_3"
    },
    "github": {
      "url": "https://edge.vinkius.com/mcp/github?token=TOKEN_4"
    },
    "slack": {
      "url": "https://edge.vinkius.com/mcp/slack?token=TOKEN_5"
    }
  }
}
Five servers. Five tools. One conversation. Ask:
“There’s a PagerDuty alert firing. Cross-reference Sentry errors, Datadog metrics, and the last GitHub deploy. Post to #incidents.”
The AI calls all five tools automatically.
Enterprise Deployment Best Practices
Team Configuration
For teams, never hardcode tokens in committed config files. Instead:
- Create a
.envfile (add to.gitignore):
VINKIUS_SLACK_TOKEN=your-token-here
VINKIUS_GITHUB_TOKEN=your-token-here- Reference environment variables in your config:
{
  "mcpServers": {
    "slack": {
      "url": "https://edge.vinkius.com/mcp/slack?token=${VINKIUS_SLACK_TOKEN}"
    }
  }
}
Access Control
- Generate one token per team member — enables individual audit trails
- Use read-only credentials for exploration; write credentials only when needed
- Rotate tokens quarterly or immediately when a team member leaves
- Monitor usage through our dashboard — every query is logged
Security Comparison: Vinkius vs. Direct API Keys
| Approach | Raw API Keys in Config | Vinkius Managed Connection |
|---|---|---|
| Where are credentials? | In plaintext on every developer’s machine | Encrypted vault (server-side) |
| Audit trail | None | Every query logged with timestamps |
| DLP protection | None — AI sees everything | SSN, credit cards, API keys auto-redacted |
| Rotation | Manual — update every config file | One-click in dashboard |
| Revocation | Update every developer’s config | Instant kill switch |
| Multi-tool governance | Each tool configured separately | Centralized dashboard |
This comparison is the core value proposition. For a deeper analysis, read our guide: MCP API Key Management: From Plaintext to Zero-Trust.
Common Configurations by Role
For Developers
Sentry + GitHub + Linear + Slack + SupabaseDebug errors → find the code → create tickets → notify team → query the database.
For Marketing Teams
HubSpot + Instagram + TikTok + Google Sheets + SlackTrack campaigns → analyze social performance → update reports → share results.
For Sales Teams
HubSpot + Stripe + Google Sheets + Slack + LinkedInCheck pipeline → verify payments → update forecast → alert team → research prospects.
For DevOps/SRE
Sentry + Datadog + PagerDuty + GitHub + SlackOur DevOps War Room Recipe — incident response in 10 seconds.
For Executive Team
Stripe + HubSpot + Google Sheets + SlackOur Revenue Intelligence Recipe — MRR, pipeline, forecast in one prompt.
Start Connecting
Browse the App Catalog → — 2,500+ MCP servers ready to connect.
- Pick your tools
- Subscribe (2 minutes per tool)
- Copy your connection URLs
- Paste into Claude, Cursor, VS Code, ChatGPT, or Windsurf
- Ask your first question
Zero code. Zero infrastructure. All your tools in one AI conversation.
Related Guides
- Convert OpenAPI to MCP → — Connect any REST API
- Architecture of MCP Servers → — JSON-RPC 2.0, SSE, primitives
- MCP API Key Management → — Security deep-dive
- All Recipes → — Multi-tool agent recipes
- The MCP Server Directory → — 2,500+ apps
Your agents need tools. We make them safe.
Pick an MCP server from the catalog. Subscribe. Copy the URL. Paste it into Claude, Cursor, or any client. One URL — DLP, audit trail, and kill switch included.
V8 sandbox isolation · Semantic DLP · Cryptographic audit trail · Emergency kill switch