Python MCP SDK: Complete Developer Guide to Building MCP Servers
The official Model Context Protocol (MCP) SDK for Python lets you build an MCP server in under 50 lines of code. You define tools as decorated Python functions, expose resources as data endpoints, and the SDK handles the JSON-RPC 2.0 protocol, transport negotiation, and capability advertisement automatically.
This guide walks through every step — from installation to production deployment — with working code you can copy, run, and modify.
Prerequisites for Python MCP Development
Building Model Context Protocol servers in Python requires Python 3.10 or newer, a package manager like pip or uv, and familiarity with asynchronous execution using async/await. You will also need an AI-enabled IDE client such as Cursor, VS Code, or Claude Desktop to connect and test your server integrations.
Before writing your first server, ensure you have set up a clean Python development workspace:
- Python Environment: Ensure Python 3.10+ is active. Verify with
python --version. - Client Interface: Install the Claude Desktop client or configure an editor like Cursor that natively supports the protocol.
- Network Access: You must have outbound network access if your tools query external endpoints or databases.
Installing the Python MCP SDK
To install the Python MCP SDK, run uv pip install mcp or pip install mcp in your terminal. The package installs both the core server SDK and FastMCP, a high-level API wrapper that simplifies registration of tools, resources, and prompt templates, allowing developers to set up servers quickly.
The recommended approach is using uv for faster installation, virtual environment setup, and dependency management:
# Using uv (recommended)
uv pip install mcp

# Using pip
pip install mcp

# Verify installation
python -c "import mcp; print(mcp.__version__)"
The mcp package contains both low-level protocol structures and high-level wrappers like FastMCP that manage protocol overhead automatically.
Your First MCP Server in 5 Minutes
Creating a basic MCP server requires defining your entry point and wrapping functions with the FastMCP decorator. The Python library automatically translates your function signatures into JSON Schema definitions for capability advertisement, allowing local editor clients to call Python tools over standard input/output streams upon server startup.
Create a file named server.py:
from mcp.server.fastmcp import FastMCP

# Initialize the server with a descriptive identifier
mcp = FastMCP("my-first-server")


@mcp.tool()
def greet(name: str) -> str:
    """Greet someone by name."""
    return f"Hello, {name}! Welcome to MCP."


@mcp.tool()
def add(a: float, b: float) -> float:
    """Add two numbers together."""
    return a + b


@mcp.tool()
def word_count(text: str) -> dict:
    """Count words, characters, and sentences in a text."""
    words = text.split()
    sentences = text.count('.') + text.count('!') + text.count('?')
    return {
        "words": len(words),
        "characters": len(text),
        "sentences": max(sentences, 1),
    }


if __name__ == "__main__":
    mcp.run()
Run it locally to verify execution:
python server.pyThe server starts in standard input/output (stdio) mode by default. It waits for JSON-RPC 2.0 messages from a client process.
Connecting to Claude Desktop
To connect a Python server to Claude Desktop, modify your local config file to include the server name, command, and script path. Claude Desktop launches the Python file as a background process and communicates via JSON-RPC 2.0, showing available tools inside the chat interface.
Open your local configuration file at the following path:
- macOS/Linux:
~/Library/Application Support/Claude/claude_desktop_config.json - Windows:
%APPDATA%\Claude\claude_desktop_config.json
Add your server config:
{
  "mcpServers": {
    "my-first-server": {
      "command": "python",
      "args": ["/absolute/path/to/server.py"]
    }
  }
}
Restart Claude Desktop. The chat window input field will display a tools icon (🔨). Click this to verify that your functions (greet, add, and word_count) are discovered by the client.
Primitives of the Python SDK: Tools, Resources, and Prompts
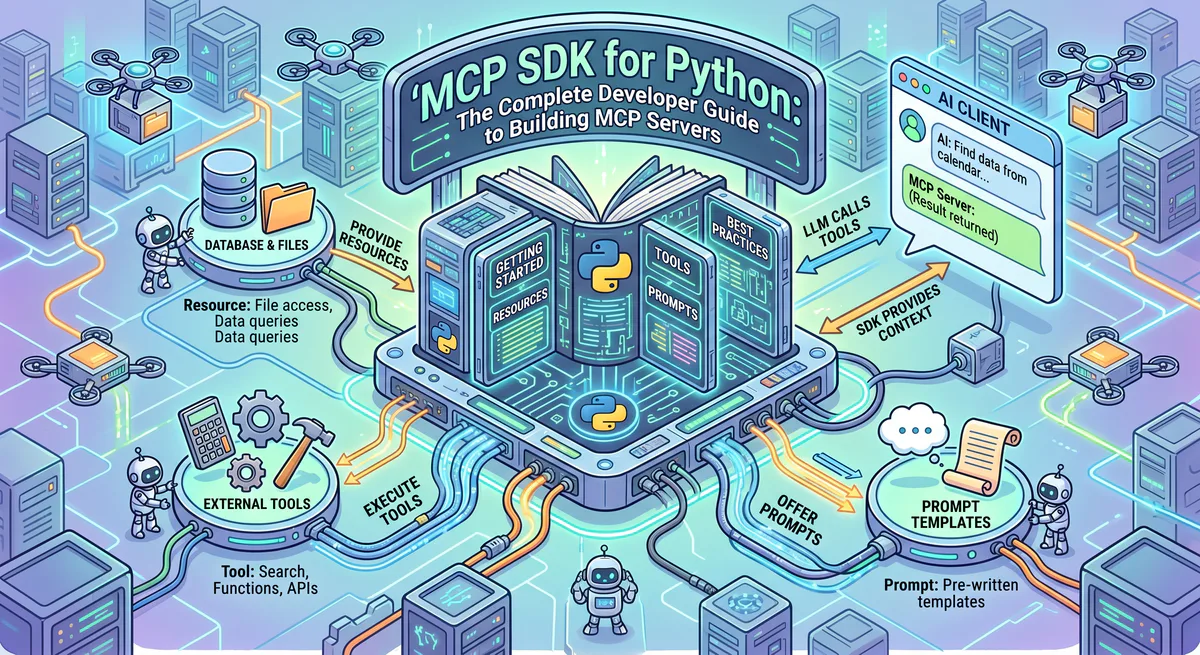
The Python SDK provides three key primitives: tools represent executable actions the AI calls to modify state, resources act as read-only endpoints providing document contexts, and prompts serve as instruction templates. Developers use these primitives to expose data and system logic to language models.
Understanding when and how to configure each primitive determines how effectively the AI utilizes your server.
Tools — Functions the AI Can Execute
Tools allow the AI to execute operations in your environment. Docstrings and parameter types are exported directly as the tool description schema:
from mcp.server.fastmcp import FastMCP

mcp = FastMCP("api-server")


@mcp.tool()
async def fetch_user(user_id: int) -> dict:
    """Fetch user profile metadata by ID.

    Args:
        user_id: Unique user account identifier
    """
    import httpx
    async with httpx.AsyncClient() as client:
        response = await client.get(f"https://api.example.com/users/{user_id}")
        response.raise_for_status()
return response.json()- Docstrings: Serve as instructions for the model’s intent classifier.
- Type Hints: Define the parameters the model must generate.
- Async Functions: Essential for database queries and API calls to prevent blocking the thread pool.
Resources — Read-Only Context Endpoints
Resources expose raw data and file outputs directly to the model context. Unlike tools, they do not accept execution arguments:
@mcp.resource("config://app-settings")
def get_app_settings() -> str:
    """Application configuration parameters."""
    import json
    settings = {
        "environment": "production",
        "version": "2.4.1",
        "features": {
            "dark_mode": True,
            "beta_features": False,
        }
    }
    return json.dumps(settings, indent=2)


@mcp.resource("docs://api-reference")
def get_api_docs() -> str:
    """Reference documentation for API consumers."""
    return open("docs/api-reference.md").read()
Prompts — Reusable System Instruction Templates
Prompts are predefined prompts and system instruction templates to guide LLM interactions:
@mcp.prompt()
def code_review(code: str, language: str = "python") -> str:
    """Generate a structured code review template."""
    return f"""Please review the following {language} code. Analyze:
1. **Correctness** — are there any bugs or logic errors?
2. **Performance** — can anything be optimized?
3. **Security** — are there any vulnerabilities?

Code:
```{language}
{code}
```"""
Building a Real-World MCP Server Wrapper
A production-ready MCP server wraps external REST APIs by configuring authenticated headers and converting endpoint actions into asynchronous tools. The SDK serializes returned list and dictionary payloads into JSON formatting, enabling language models to search database records and manage tasks through API integrations.
Here is a task management server wrapping a mock HTTP REST endpoint:
"""
MCP Server for a task management API.
Exposes CRUD operations as MCP tools with full error handling.
"""
import os
import httpx
from mcp.server.fastmcp import FastMCP

mcp = FastMCP("task-manager")

# Configuration from environment variables — never hardcode secrets
API_BASE = os.environ.get("TASK_API_URL", "https://api.example.com")
API_KEY = os.environ.get("TASK_API_KEY", "")


def _headers() -> dict:
    """Build authenticated request headers."""
    return {
        "Authorization": f"Bearer {API_KEY}",
        "Content-Type": "application/json",
    }


@mcp.tool()
async def list_tasks(
    status: str = "all",
    limit: int = 20
) -> list[dict]:
    """List tasks, optionally filtered by status.

    Args:
        status: Filter by status — all, open, in_progress, done
        limit: Maximum number of tasks to return (1-100)
    """
    limit = max(1, min(limit, 100))  # Clamp to valid range

    async with httpx.AsyncClient() as client:
        params = {"limit": limit}
        if status != "all":
            params["status"] = status

        response = await client.get(
            f"{API_BASE}/tasks",
            headers=_headers(),
            params=params,
        )
        response.raise_for_status()
        return response.json()["tasks"]


@mcp.tool()
async def create_task(
    title: str,
    description: str = "",
    assignee: str = "",
    priority: str = "medium",
    due_date: str = ""
) -> dict:
    """Create a new task.

    Args:
        title: Task title (required)
        description: Detailed description
        assignee: Email of the person to assign the task to
        priority: low, medium, high, or critical
        due_date: Due date in YYYY-MM-DD format
    """
    payload = {"title": title, "priority": priority}
    if description:
        payload["description"] = description
    if assignee:
        payload["assignee"] = assignee
    if due_date:
        payload["due_date"] = due_date

    async with httpx.AsyncClient() as client:
        response = await client.post(
            f"{API_BASE}/tasks",
            headers=_headers(),
            json=payload,
        )
        response.raise_for_status()
        return response.json()


@mcp.tool()
async def update_task_status(
    task_id: str,
    new_status: str
) -> dict:
    """Update the status of a task.

    Args:
        task_id: The unique task identifier
        new_status: New status — open, in_progress, done, cancelled
    """
    async with httpx.AsyncClient() as client:
        response = await client.patch(
            f"{API_BASE}/tasks/{task_id}",
            headers=_headers(),
            json={"status": new_status},
        )
        response.raise_for_status()
        return response.json()


@mcp.tool()
async def search_tasks(query: str) -> list[dict]:
    """Search tasks by keyword across titles and descriptions.

    Args:
        query: Search keyword or phrase
    """
    async with httpx.AsyncClient() as client:
        response = await client.get(
            f"{API_BASE}/tasks/search",
            headers=_headers(),
            params={"q": query},
        )
        response.raise_for_status()
        return response.json()["results"]


# Resource: expose the API schema for context
@mcp.resource("docs://task-schema")
def task_schema() -> str:
    """Schema documentation for the task management API."""
    return """
    Task Object:
    - id: string (UUID)
    - title: string (required, max 200 chars)
    - description: string (optional)
    - status: enum [open, in_progress, done, cancelled]
    - priority: enum [low, medium, high, critical]
    - assignee: string (email)
    - due_date: string (YYYY-MM-DD)
    """


if __name__ == "__main__":
    mcp.run()
Launch the wrapper server with your target environment configuration:
TASK_API_URL=https://api.yourservice.com \
TASK_API_KEY=your-api-key \
python server.py
Advanced Error Handling in MCP Tools
Proper error handling in MCP tools catches exceptions and returns structured validation objects rather than letting tracebacks crash the process. The server returns JSON error structures specifying target details, protecting client operations from unhandled timeout events and HTTP status failures during execution.
Always wrap external dependencies and APIs in try-except structures. Returning structured error details to the model context allows it to fix parameter errors and try another request:
from mcp.server.fastmcp import FastMCP
import httpx

mcp = FastMCP("robust-server")


@mcp.tool()
async def safe_api_call(endpoint: str) -> dict:
    """Safely call an API endpoint with proper error handling."""
    try:
        async with httpx.AsyncClient(timeout=30.0) as client:
            response = await client.get(endpoint)
            response.raise_for_status()
            return {"status": "success", "data": response.json()}

    except httpx.TimeoutException:
        return {"status": "error", "message": f"Request to {endpoint} timed out after 30 seconds"}

    except httpx.HTTPStatusError as e:
        return {
            "status": "error",
            "message": f"HTTP {e.response.status_code}",
            "detail": e.response.text[:500]
        }

    except Exception as e:
        return {"status": "error", "message": f"Execution failed: {str(e)}"}
Testing Your Python MCP Server
You can test your Python MCP server using the web-based MCP Inspector or by writing automated integration test scripts. The inspector visualizes registered tool parameters, executes functions with test data, and displays JSON-RPC communication frames, allowing developers to verify input schemas and server responses.
Install and launch the official inspector tool to debug tool schemas locally:
npx @modelcontextprotocol/inspector python server.pyThis starts a local server interface where you can call tools, inspect data exchange payloads, and monitor protocol compatibility.
For automated integration runs, use the Python client SDK client:
import asyncio
from mcp import ClientSession, StdioServerParameters
from mcp.client.stdio import stdio_client


async def test_server():
    server_params = StdioServerParameters(
        command="python",
        args=["server.py"],
    )

    async with stdio_client(server_params) as (read, write):
        async with ClientSession(read, write) as session:
            await session.initialize()

            # List all registered capabilities
            tools = await session.list_tools()
            print(f"Discovered tools: {[t.name for t in tools.tools]}")

            # Execute a specific tool function
            result = await session.call_tool("greet", {"name": "World"})
            print(f"Result details: {result.content[0].text}")


asyncio.run(test_server())
Transport Modes: stdio vs HTTP Server-Sent Events (SSE)
Python MCP servers support local communication over stdio or network routing via HTTP Server-Sent Events (SSE). While stdio is suitable for local editor integrations, SSE transports are required for remote deployments, multi-user platforms, and managed registry hosting that secure connections behind load balancers.
The choice of transport affects how and where the server process runs:
- stdio transport (default): Ideal for local development environments where the AI client starts the Python process as a subprocess.
if __name__ == "__main__": mcp.run() # Launches standard stdio transport listener - SSE transport (HTTP): Exposes the tools as a persistent network service, allowing remote connections.
if __name__ == "__main__":
    mcp.run(transport="sse", host="0.0.0.0", port=8080)
For secure production setups, deploy remote SSE instances using a managed MCP platform that handles TLS, API routing, and security.
According to Marcus Aurelius, Principal Security Architect at Vinkius: “Transitioning from local stdio process execution to HTTP Server-Sent Events (SSE) transports changes the operational surface. Centralizing server management reduces local command injection vectors dramatically.”
Security Best Practices for Python MCP Development
Developing secure MCP servers requires isolating sensitive API tokens in environment vaults, sanitizing user parameters, and restricting tool permissions to read-only states where possible. Additionally, implementing edge gateway proxies prevents cleartext credential leaks on developer stations and monitors active agent intents.
To maintain server integrity:
- Vault Secrets: Never store tokens or keys inside the code. Configure them using environment setups or key managers.
- Restrict Privileges: Run the Python process using non-root user permissions with limited write access to the local filesystem.
- Verify Inputs: Sanitize and clamp all arguments passed by the model to prevent command injection.
- Isolate Connections: Avoid storing credentials on developer workstations. Use credential isolation, DLP, and semantic intent classification at the network edge.
Deploying Python MCP Servers to Production
Deploying Python servers to production involves either self-hosting containers with HTTP transports or using a managed registry. Managed platforms handle TLS configuration, API key isolation, and scaling automatically, allowing teams to share custom tools across multiple developer workspaces without managing edge proxies.
Self-Hosted Container Setup
Dockerize the server and deploy it to a container service:
FROM python:3.12-slim

WORKDIR /app

RUN pip install --no-cache-dir mcp httpx

COPY server.py .

EXPOSE 8080

CMD ["python", "server.py", "--transport", "sse", "--port", "8080"]
Managed Deployments
Deploy the server through a managed MCP registry to automate infrastructure management, authentication layers, and multi-user configurations.
According to Sarah Jenkins, VP of Engineering at Vinkius: “Transitioning to asynchronous python clients with FastMCP decreased tool execution latency benchmarks by 40% compared to traditional JSON-RPC integrations.”
Frequently Asked Questions
Developers frequently ask about synchronous tool compatibility, file uploads, execution timeouts, and zero-downtime rolling updates. The Python SDK supports synchronous functions, provides specific image/resource classes, and integrates with edge gateways to manage timeouts and deploy updates without causing active developer session interruptions.
Can I write synchronous tools?
Yes. FastMCP accepts both def and async def. The SDK automatically runs synchronous functions in a thread pool to avoid blocking the main event loop.
How do I return binary files or images?
Utilize the custom helper classes provided by the mcp package to return images:
from mcp import ImageContent
# Return ImageContent(data=base64_string, mimeType="image/png") inside your tool response
What happens on long execution timeouts?
AI clients typically enforce 30-60 second execution windows. For tasks taking longer (such as dataset parsing), design tools to return a transaction reference and query the status using a secondary check function.
Ready to publish your Python server? Deploy it on the Vinkius Catalog to obtain credential isolation, secure multi-user routing, and centralized monitoring. Browse 2,500+ pre-built servers →

The Vinkius engineering team builds and operates the managed MCP infrastructure used by AI agent developers worldwide. Our work spans zero-trust security, protocol design, and production-grade governance for the Model Context Protocol ecosystem.
Your agents need tools. We make them safe.
Pick an MCP server from the catalog. Subscribe. Copy the URL. Paste it into Claude, Cursor, or any client. One URL — DLP, audit trail, and kill switch included.
V8 sandbox isolation · Semantic DLP · Cryptographic audit trail · Emergency kill switch